I was a zombie chef for school (and I'll do it again when I got trick or treating on Sunday, because there is no way I'm too old for that). I was so proud of my costume - I had a chef's coat, a chef's toque, and a folded apron tied around my waste. But as I was a dead chef, my whole face was covered in black and blue bruises and smearings of fake blood. And I carried around a bloody spatula.
It was disturbing and I loved it.
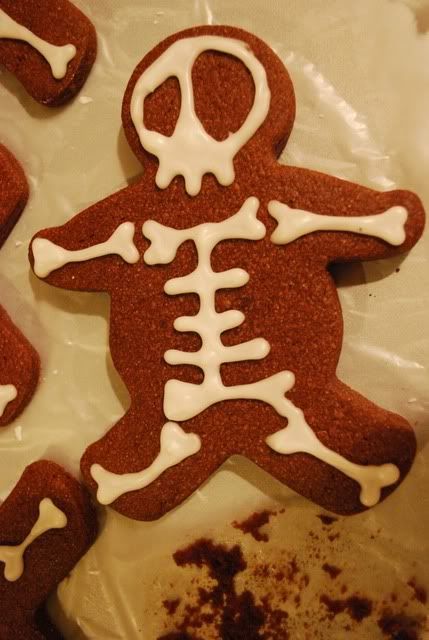
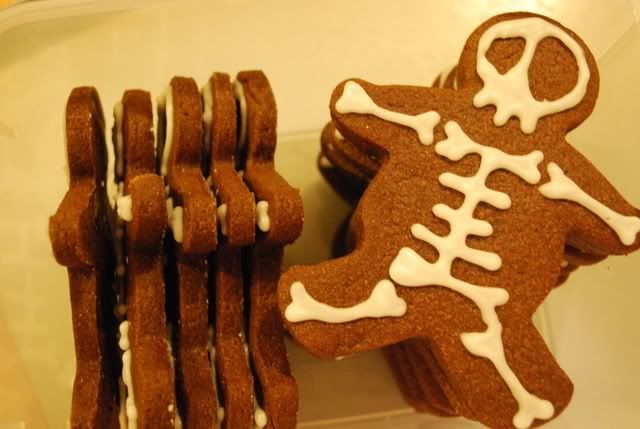
Anyways, about these cookies. They're simple chocolate sugar cookies, and even on their own, they're delicious. I made a few rounds with the bits of leftover dough, and my family and I could not stop picking at them! I saw this idea done quite a few times with gingerbread dough, but as I'm not a huge fan, and neither are most high schoolers I know, I decided to use the same concept on chocolate sugar cookies. The dough is great: it holds its shape wonderfully, it hardly sticks, and it tastes great. The only slightly tricky part is the piping. Even that, though, I wouldn't worry about. These cookies don't have to look perfect - they actually look better if their lines are a little crooked and creepy! I think it gives them a whimsical feel, a la Corpse Bride. In fact, I actually started trying to pipe their eyes a bit asymmetrical once I'd gotten the hang of it, and they look really cute that way.
I just love Halloween. The fun spookiness makes it one of my favorite holidays. I'm definitely making these chocolate skellies a Halloween tradition from now on - and even if I am a bit too old to keep going trick or treating, I'll keep dressing up! Whatever you choose to be (let me know what you're going as!), I hope you have a wonderful Halloween filled with creepy fun and yummy chocolate skeletons.
Your Baking Soundtrack for Chocolate Skellies:
The Rocky Horror Picture Show - Original Soundtrack
It's tradition!
Chocolate Skellies
From Joy of Baking
Ingredients
355 grams all-purpose flour
75 grams cocoa powder
1/2 teaspoon salt
1 teaspoon baking powder
227 grams butter, room temperature
350 grams sugar
2 eggs
2 teaspoons vanilla extract
Combine the flour, cocoa powder, salt, and baking powder in a large bowl.
In the bowl of an electric mixer fitted with the paddle attachment, cream together the butter and sugar.
Add the eggs one at a time, beating well after each addition.
Add the vanilla.
Slowly add in the flour mixture and beat until the dough is smooth and uniform.
Divide the dough in half and flatten each half into a rough disk. Wrap in plastic wrap and refrigerate for at least one hour, or until firm enough to roll.
Line two baking sheets with parchment paper.
Remove one disk of dough and roll out to 1/4-inch thick on a lightly floured surface.
Using a gingerbread man cutter 5" in length, cut out cookies and place them on the prepared pan.
Re-refrigerate the scraps while you work with the other disk of dough so that they will be cold when you re-roll them.
Repeat with the other half of dough.
Refrigerate the baking sheets 10-15 minutes before baking to ensure the cookies keep their shape in the oven.
Bake at 350˚F for 15-18 minutes, until the edges of the cookies are firm (it may take less time if you cut smaller cookies. Check them regularly).
Let the cookies cool for a few minutes on the baking sheets, then transfer them to a wire rack to finish cooling.
Simple Piping Glaze
Ingredients
1 cup sifted powdered sugar
1 1/2 tablespoons milk
Stir together the powdered sugar and milk. Correct the consistency of the icing, if necessary, with more powdered sugar or more milk, until it is firm enough to pipe lines without spreading.
Fit a piping bag with a small, round tip and fill it with the icing.
Pipe skeletons onto the cookies.
Note: Only make the icing when the cookies are cool and ready to be iced. If you leave it standing for a while, it will harden. Likewise, try to work quickly with the icing so that it does not stiffen in the piping bag.
Allow the icing to harden completely on the cookies before storing them.


Welcome back! Missed you!!!! I attempted to make something similar today but they didn;t turn out anywhere near as well as yours!
ReplyDeleteNgaww......these are so cute!! (even if they're supposed to be spooky more than cute....) Happy Halloween!! I love all the creative things people make during halloween. Unfortunately I'm in the middle of exams so I can't celebrate halloween =( I love these cookies though- I'll have to try and remember to make these next year!! And the zombie chef sounds really cool!!
ReplyDeleteWelcome back girl! These look super super cute!
ReplyDeleteWe would have made a great pair on Halloween. I was a zombie lunch lady - blue dress, white apron, beads attached to my glasses, hair net finished off with blood, open wounds and a ladle with severed fingers glued inside.
ReplyDeleteTwisted minds think alike. Love these cookies, too. Your piping is so intricate.
Awww - how cute are these! Adorable, and perfect for Halloween.
ReplyDelete